When embarking on a paver installation project, understanding the fundamentals is crucial for achieving a polished and professional look. Pavers are versatile materials that can enhance the aesthetic appeal of any outdoor space, but their installation requires careful planning and execution. One of the most challenging aspects of this process is cutting pavers to fit around curves or corners, which is essential for creating a seamless layout that complements your design vision. Proper paver cutting techniques not only ensure that each piece fits snugly into place but also contribute to the overall durability and longevity of your installation. Whether you are working with concrete, brick, or natural stone pavers, knowing how to accurately measure and cut will save you time and frustration.
This section will lay the groundwork for understanding the various methods available for cutting pavers, as well as the tools required to achieve precise results. As you prepare for your project, consider the layout of your pavers carefully. A well-thought-out design will guide your cutting process and help you visualize how each piece will fit together. By mastering the basics of paver installation, including effective cutting techniques, you can transform your outdoor area into a stunning space that reflects your personal style while standing up to the elements.
Tools Required for Cutting Pavers
When it comes to paver installation, having the right tools for cutting pavers is essential for achieving clean, precise edges, especially around curves and corners. Below are some of the most important tools you will need:- Wet Saw: A wet saw is one of the best tools for cutting pavers, as it uses water to cool the blade and reduce dust.
This tool is ideal for making straight cuts and can handle various materials, including concrete and stone.
- Angle Grinder: For more intricate cuts, an angle grinder equipped with a diamond blade is invaluable. It allows for greater maneuverability and can easily cut curves or notches in pavers.
- Paver Splitter: A paver splitter is designed specifically for cutting pavers without creating dust. It works by applying pressure to split the paver along a predetermined line, making it perfect for straight cuts.
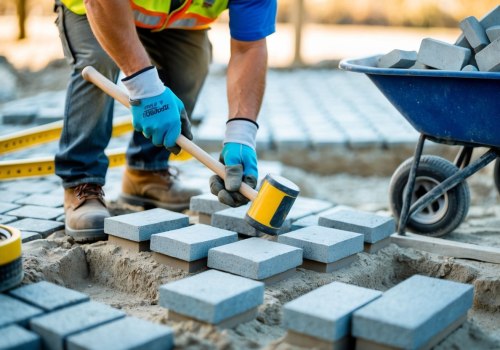
- Chisel and Hammer: For minor adjustments or when working with softer materials, a chisel and hammer can be effective. This method requires more manual effort but can be useful for small modifications.
- Measuring Tools: Accurate measurements are crucial in paver installation.
Use a tape measure, square, and chalk line to mark your cuts clearly before you begin.
Measuring and Marking Pavers for Curves and Corners
When it comes to paver installation, accurately measuring and marking your pavers is essential, especially when dealing with curves and corners. This process ensures that each piece fits perfectly, creating a professional-looking finish.Measuring for Curves
To measure for curves, start by determining the radius of the curve you want to create. Use a flexible measuring tape or a piece of string to outline the curve on the ground.This will serve as your guide for both measuring and cutting the pavers.
- Step 1: Place stakes at both ends of the curve and attach the string to create a visual reference.
- Step 2: Measure the distance from the string to where the pavers will be laid, ensuring you account for any gaps needed for sand or mortar.
Marking Pavers for Cutting
Once you have your measurements, it’s time to mark the pavers. Use a chalk line or a marker to indicate where cuts need to be made. For curves, it’s helpful to use a template or a piece of cardboard cut to the desired shape.- Tip: Always mark on the back side of the paver to keep your cuts clean and avoid visible markings on the finished surface.
- Tip: If you’re working with intricate designs, consider using a jigsaw or wet saw for more precise cuts.
By taking the time to measure and mark accurately, you’ll ensure that your pavers fit seamlessly around curves and corners, enhancing both functionality and aesthetics.
Techniques for Cutting Pavers Around Curves
When it comes to paver installation, achieving a seamless look around curves can be challenging but rewarding. Here are some effective techniques for cutting pavers to fit around curves:1.Use a Template
Creating a template is one of the most reliable methods for cutting pavers to fit curves. Follow these steps:- Materials Needed: Cardboard or plywood, pencil, and measuring tape.
- Measure the curve where the pavers will be installed.
- Cut a piece of cardboard or plywood to match the curve's shape.
- Trace the template onto the paver using a pencil.
- Cut the paver along the traced line using a wet saw or angle grinder.
2.The Scribe Method
The scribe method is another effective technique for cutting pavers around curves:- Materials Needed: A scribing tool or a straight edge, pencil, and cutting tool.
- Place a whole paver next to the curve.
- Use the scribing tool to mark the curve on the paver by following the edge of the curve.
- Cut along the marked line with your chosen cutting tool.
3.Using a Wet Saw
A wet saw is an excellent tool for making precise cuts on pavers:- Benefits: It minimizes dust and provides cleaner cuts.
- Set up your wet saw according to the manufacturer's instructions.
- Carefully cut along your marked lines, ensuring you maintain control for accuracy.
Cutting Pavers for Corners: Step-by-Step Guide
Cutting pavers to fit around corners can be a challenging aspect of paver installation, but with the right techniques and tools, you can achieve a professional-looking finish.Here’s a step-by-step guide to help you navigate this process effectively.
- Gather Your Tools: Before you start, ensure you have the necessary tools. You will need a wet saw or a chisel and hammer, a measuring tape, a pencil for marking, and safety goggles.
- Measure the Corner: Begin by measuring the angle of the corner where the paver will fit. Most corners are either 90 degrees or 45 degrees. Use your measuring tape to determine the length of the paver needed for each side of the corner.
- Mark Your Cuts: Using a pencil, mark the paver where it needs to be cut.
For a 90-degree corner, you will typically cut at an angle that allows the paver to fit snugly against both sides. For rounded corners, consider marking a curve that matches the desired radius.
- Cutting Techniques: Depending on your tools, there are different methods for cutting:
- Wet Saw: If using a wet saw, carefully align your marked line with the blade and make the cut slowly to ensure precision.
- Chisel and Hammer: For those using a chisel, score along your marked line with the chisel and then tap it gently with a hammer until it breaks along the line.
With patience and practice, cutting pavers for corners can become an easy part of your paver installation process.
Common Mistakes to Avoid When Cutting Pavers
When it comes to paver installation, cutting pavers accurately is crucial for achieving a professional finish. However, many DIY enthusiasts and even seasoned installers make common mistakes during this process. Here are some frequent errors to watch out for and tips on how to avoid them:- Inaccurate Measurements: One of the most common mistakes is failing to measure correctly. Always double-check your measurements before cutting.
Use a measuring tape and mark the paver clearly with a pencil or chalk to ensure precision.
- Using the Wrong Tools: Using inappropriate tools can lead to uneven cuts and damaged pavers. Ensure you have the right equipment, such as a wet saw or a masonry saw, which are designed for cutting hard materials like pavers.
- Neglecting Safety Precautions: Cutting pavers can be hazardous. Always wear safety goggles and gloves to protect yourself from flying debris and sharp edges.
- Rushing the Process: Cutting pavers is not a race. Take your time to ensure each cut is accurate.
Rushing can lead to mistakes that may require additional cuts or even replacement of pavers.
- Ignoring the Curve: When cutting pavers for curves, many installers forget to account for the natural arc. Use a flexible template or string line to guide your cuts, ensuring they follow the curve smoothly.
FAQs About Cutting Pavers Around Curves and Corners
When it comes to paver installation, cutting pavers to fit around curves and corners can be a challenging task. Here are some frequently asked questions that can help clarify the process:- What tools do I need to cut pavers? To effectively cut pavers, you will need a few essential tools: a wet saw for precise cuts, a chisel and hammer for smaller adjustments, or a angle grinder for intricate shapes.
- How do I measure for cutting pavers around curves? Start by laying out your pavers in the desired pattern.
Use a flexible measuring tape or a piece of string to trace the curve. Mark the paver where it needs to be cut, ensuring you account for any gaps needed for jointing material.
- Can I use a regular saw to cut pavers? While a regular saw may work for softer materials, it is not recommended for concrete or stone pavers. A wet saw or angle grinder is preferred as they provide cleaner cuts and reduce the risk of chipping.
- What is the best technique for cutting pavers around corners? For corners, it’s best to make multiple small cuts rather than one large cut. This allows for better control and reduces the chance of breaking the paver.
Always start with a shallow cut and gradually deepen it.
- How do I ensure a snug fit when cutting? After cutting, test fit the paver in place before finalizing the installation. If it doesn’t fit perfectly, make small adjustments as needed. Remember that using sand or polymeric jointing material can help fill any minor gaps.
Conclusion: Key Takeaways on Paver Installation Techniques
In summary, mastering the art of paver installation is essential for achieving a durable and aesthetically pleasing outdoor space. Throughout this article, we have explored various techniques that can significantly enhance the quality of your installation. One of the most critical aspects discussed is the importance of precise measurements and planning.Taking the time to measure your area accurately ensures that you minimize waste and avoid unnecessary cuts, which can compromise the integrity of your design.
Key Techniques for Successful Paver Installation
- Cutting Pavers: When dealing with curves or corners, using a wet saw or a masonry chisel can provide clean cuts that fit seamlessly into your layout.
- Base Preparation: A solid base is crucial. Ensure that you compact the sub-base thoroughly to prevent settling and shifting over time.
- Jointing Material: Selecting the right jointing material not only enhances the appearance but also helps in stabilizing the pavers against movement.
By applying these techniques and principles, you can achieve a professional-looking result that enhances your outdoor environment for years to come.